本文将通过一个实例,讲解从全局JS脚本定义,到通过CSS定义调整样式,最后到在全局事件调用脚本执行的全过程,带大家了解在数智大屏中使用上述三个功能的配置过程及步骤。
效果实例
预览/访问发布大屏时,加载结束后弹出窗口显示欢迎信息:

配置过程
JS脚本定义
定义JS脚本,实现:弹窗显示“欢迎来到数智大屏驾驶舱”,点击关闭按钮可关闭弹窗。
在页面设置>JS脚本中的脚本编辑器中定义脚本:
 window.showmyalert = function(){
  if(document.querySelector('#my-alert')) return

  const body = document.body
  const _div =   document.createElement('div')
  _div.setAttribute('class', 'my-alert')
  _div.setAttribute('id', 'my-alert')
  _div.innerHTML = `
    <span class="close" onClick="closemyalert(event)">X</span>
    <h2>欢迎来到数智大屏驾驶舱</h2>
  `

  _div.addEventListener('mousedown', (e)=>{
    _div.addEventListener('mousemove',myalertMove)
    _div.style.cursor = 'move'
  })

  _div.addEventListener('mouseup',(e)=>{
    _div.removeEventListener('mousemove',myalertMove)
    _div.style.cursor = 'default'
  })

  _div.addEventListener('mouseleave',(e)=>{
    _div.removeEventListener('mousemove',myalertMove)
    _div.style.cursor = 'default'
  })

  body.appendChild(_div)
}

window.closemyalert = function(e){
  document.body.removeChild(e.target.parentNode)
}

window.myalertMove = function(e){
  const { clientX, clientY } = e
  const _myAlert = document.querySelector('.my-alert')
  _myAlert.style.left = clientX + 'px'
  _myAlert.style.top = clientY + 'px'
}
CSS脚本定义
定义CSS脚本,改变窗口和文本样式。
在页面设置>CSS样式下的脚本编辑器中定义脚本:
body{
  position: relative;
}

body .my-alert{
  position: absolute;
  left: 50%;
  top: 50%;
  width: 300px;
  height: 80px;
  transform: translate(-50%,-50%);
  background: #000;
  border-radius: 4px;
  box-shadow: 0 0 6px 2px rgba(255,255,255,.3);
  z-index: 99;
  padding:25px 40px;

}

body .my-alert .close{
  position: absolute;
  top: 4px;
  right:10px;
  font-size: 12px;
  cursor: pointer;
  user-select: none;
  color: #fff;
}

body .my-alert h2{
  color: #fff;
  font-size: 18px;
  font-family: trends;
}
全局事件配置
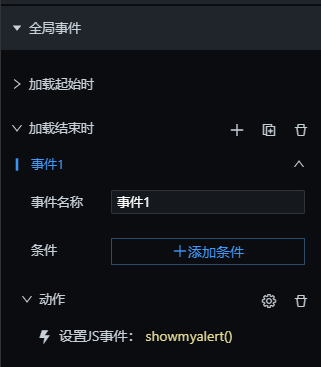
大屏加载结束时执行全局定义的JS脚本:
- 在页面设置>全局事件下,展开“加载结束时”后,点击“+”
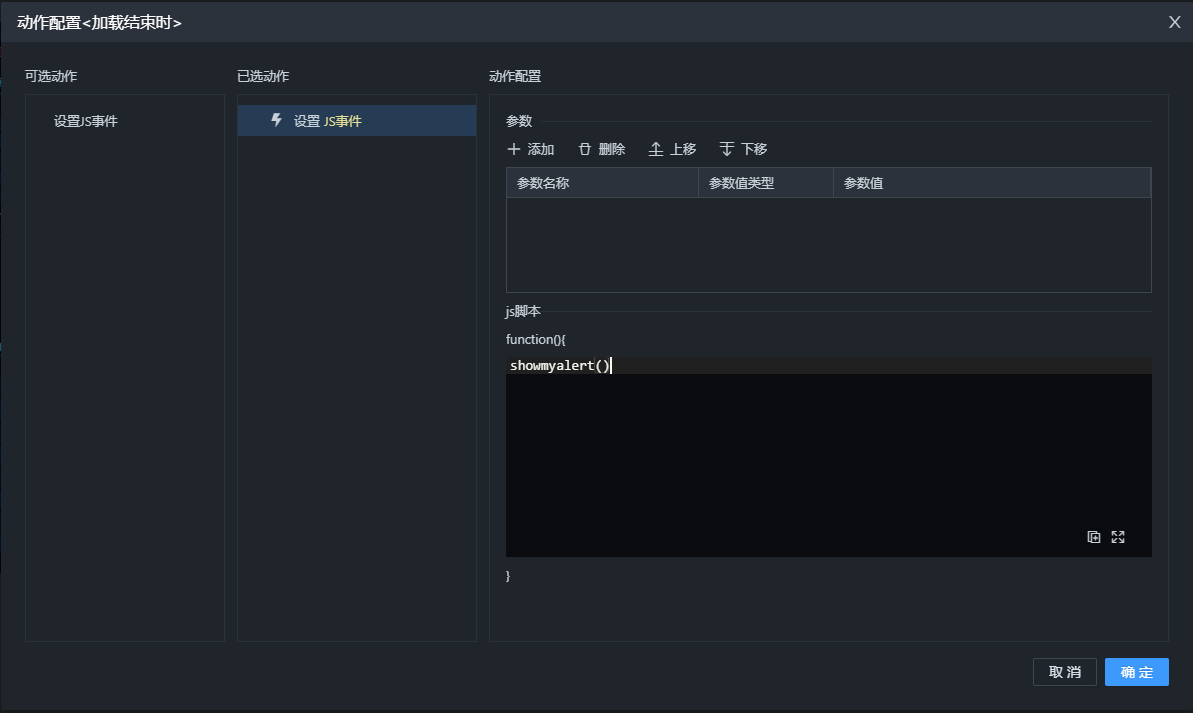
- 事件动作配置窗口中配置:

- 点击“确定”完成配置。

作者:倪 创建时间:2023-07-06 09:16
最后编辑:倪 更新时间:2025-11-28 11:30
最后编辑:倪 更新时间:2025-11-28 11:30
 扫码关注网盛数新公众号,获取更多帮助资料
